NopCommerce Plugin Installation

Click for Param Virtual Pos Plugin
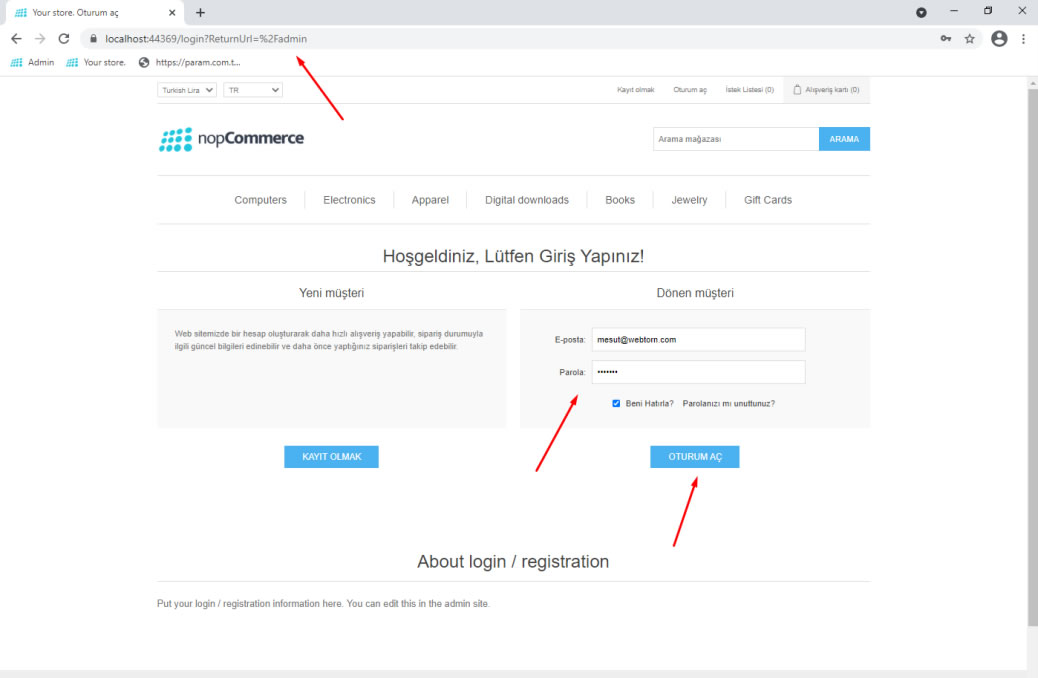
01.We log in to the Nopcommerce admin panel.
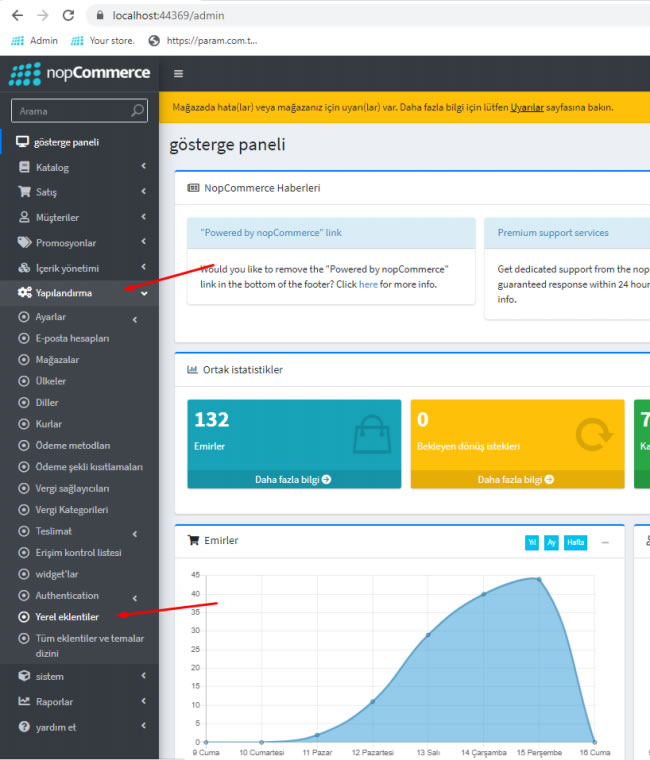
02.From the Left Menu, click on Configuration -> Local plugins.
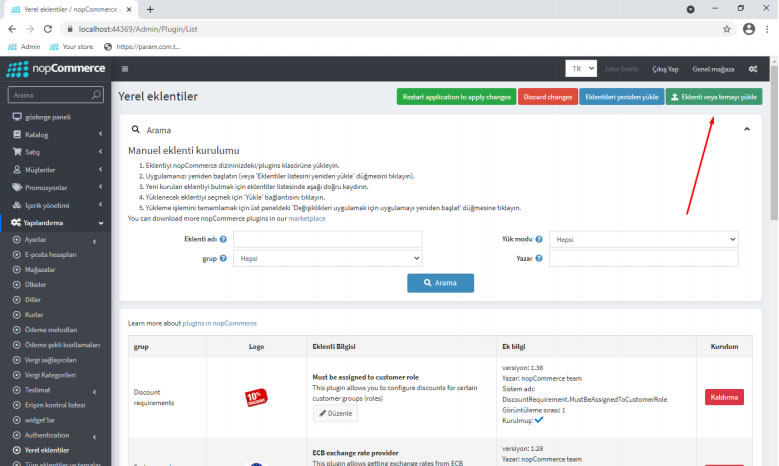
03.Click on the Install plugin and theme button.
04.On the upload screen that opens, click the select file button.
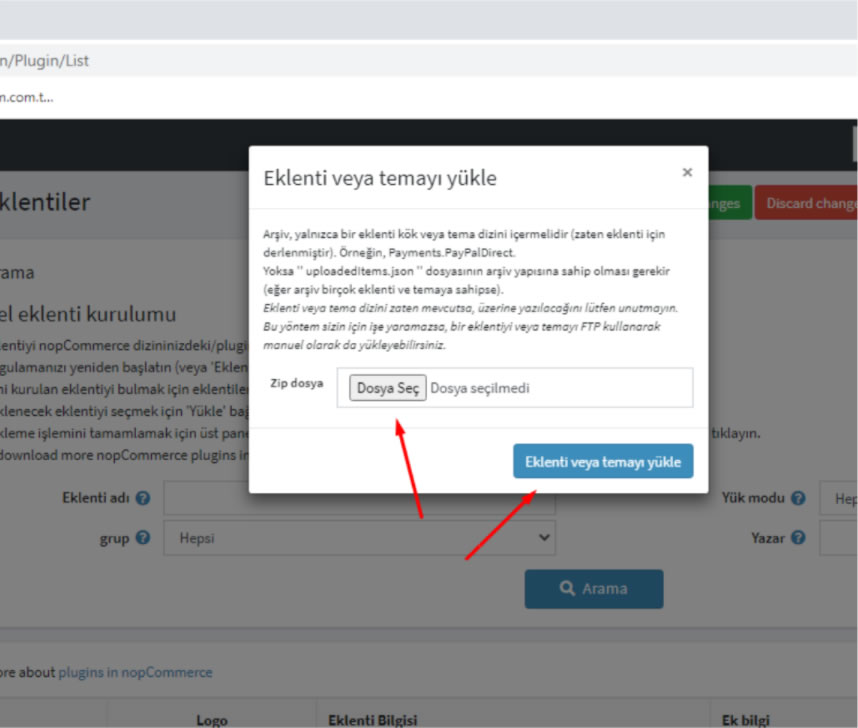
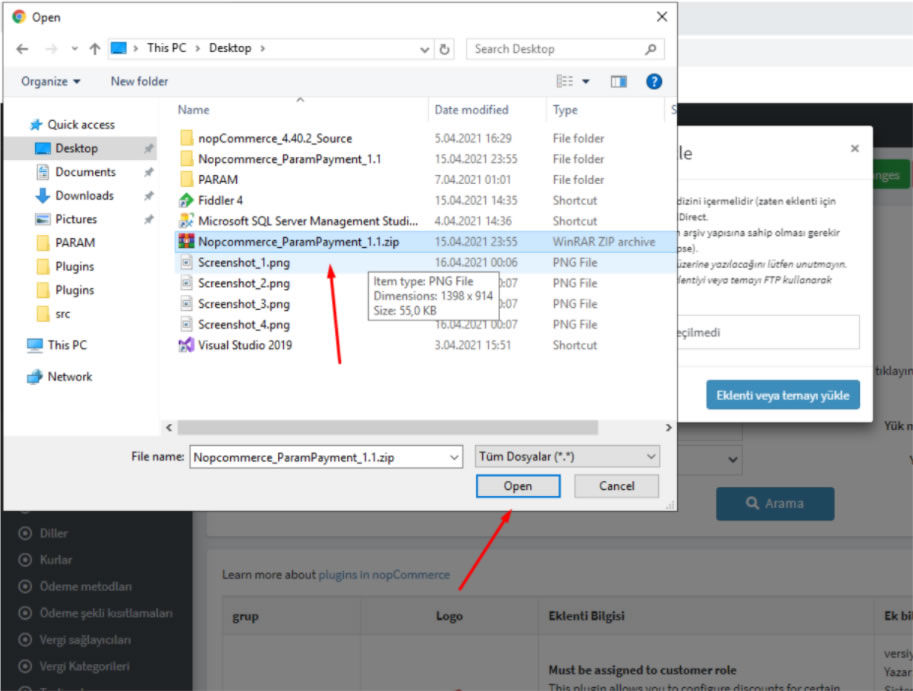
05.We select the zip file with the param pos module from the screen that opens. Click on the Install plugin or theme button.
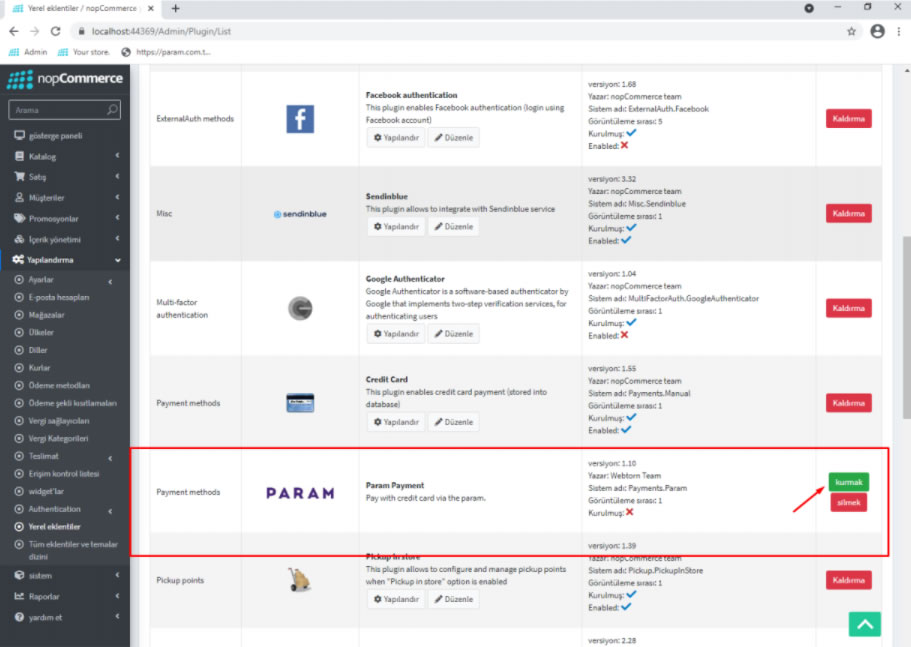
06.We click the install button opposite the param pos module from the add-on list.
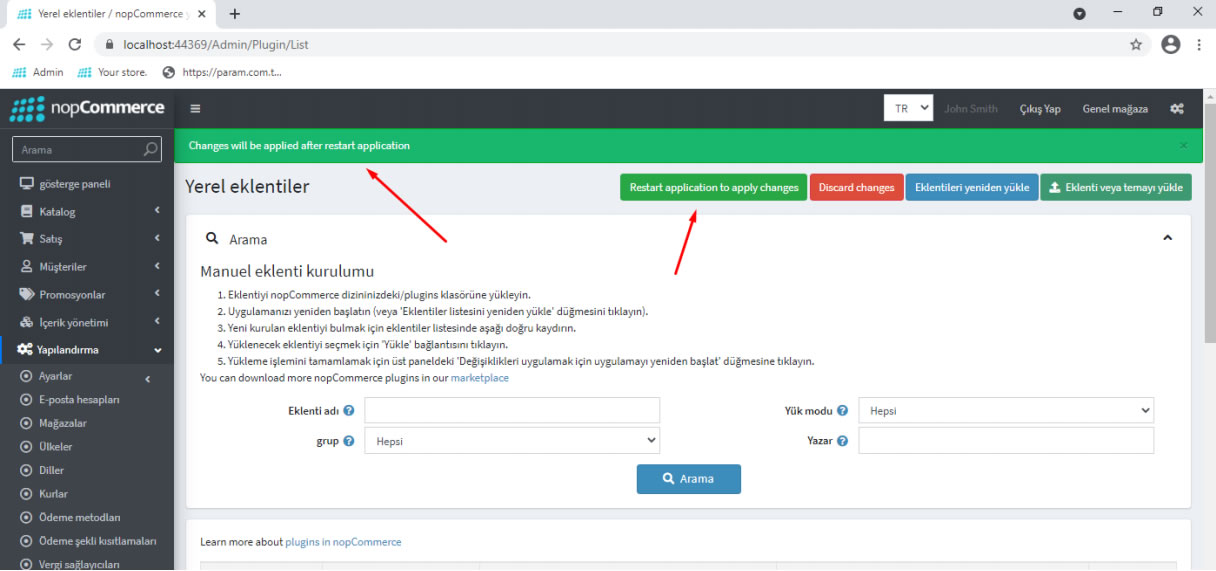
07.After the plugin is installed, we click on the restart application to apply changes button (refresh to save changes).
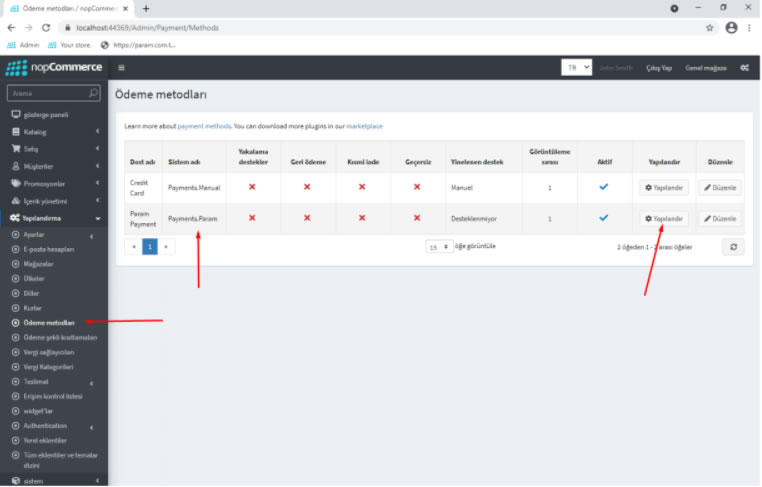
08.Click on Payment methods from the left menu.
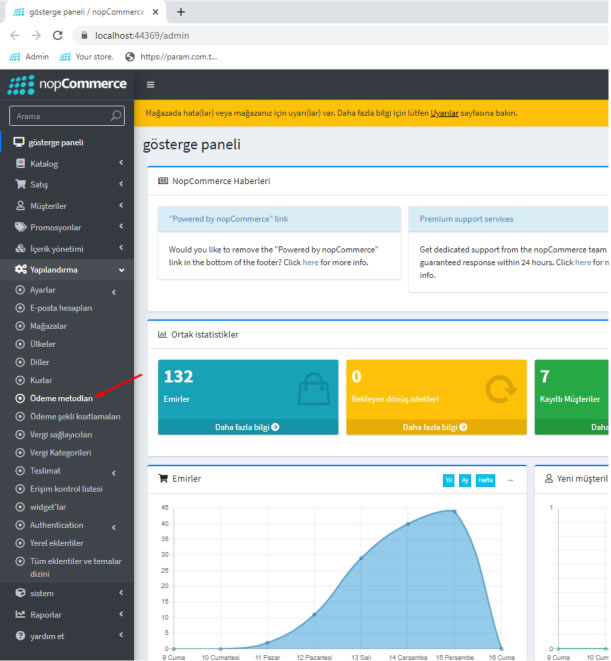
09.We click on the configure button opposite the Payments param section.
10. By logging in to the Param internet branch, which you can also access via Param.com.tr, we receive the necessary Integration information and enter the information in the relevant fields on the configuration screen.
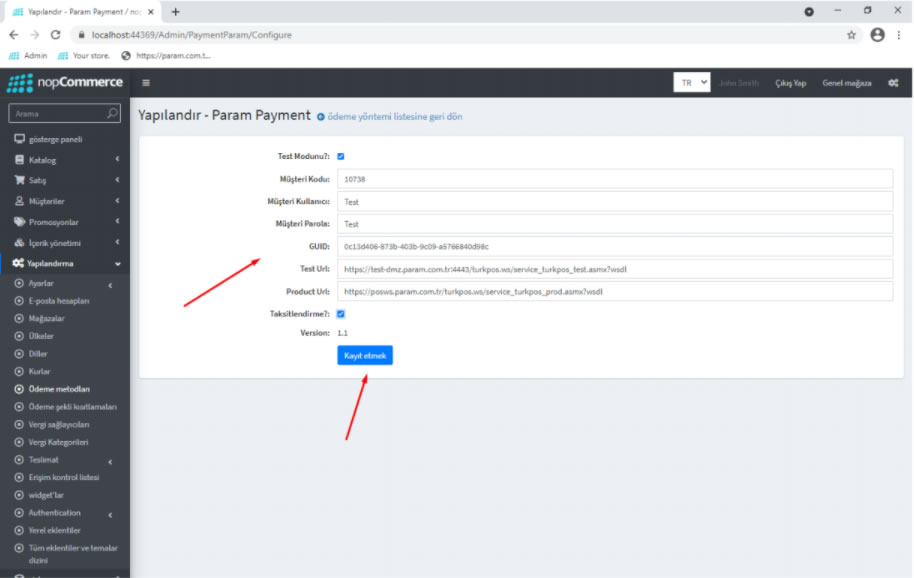
11.You can learn this information from the “My Integration Information” tab under the “PARAM POS” menu of the PARAM internet branch.
Example - Test user information:
12.We complete the process by saving.
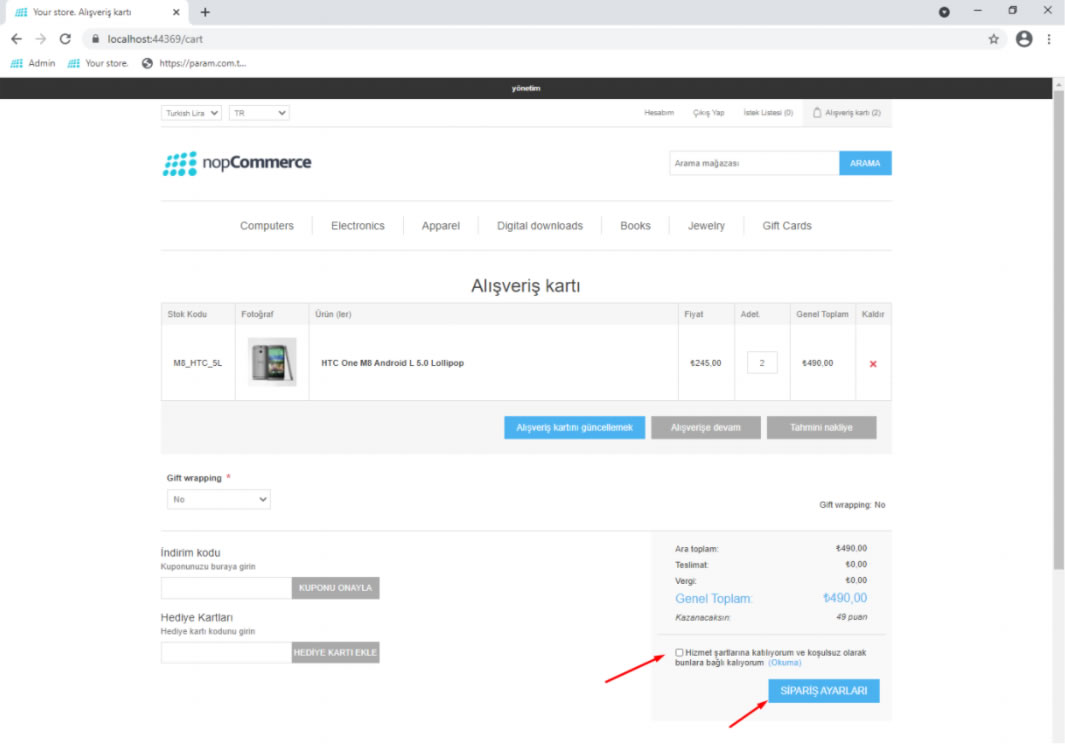
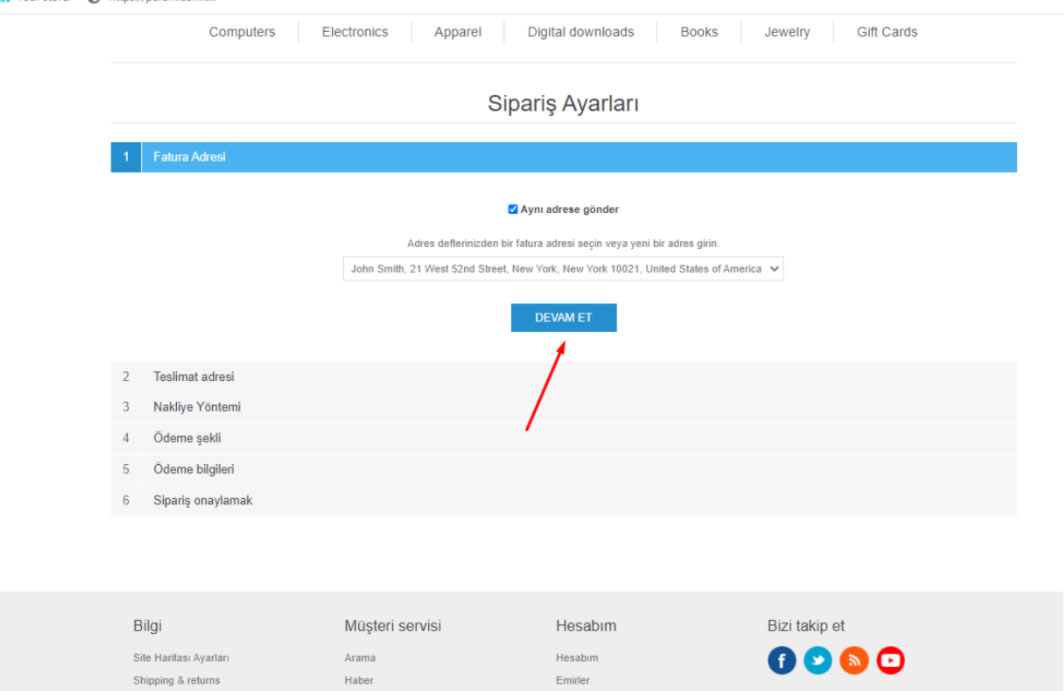
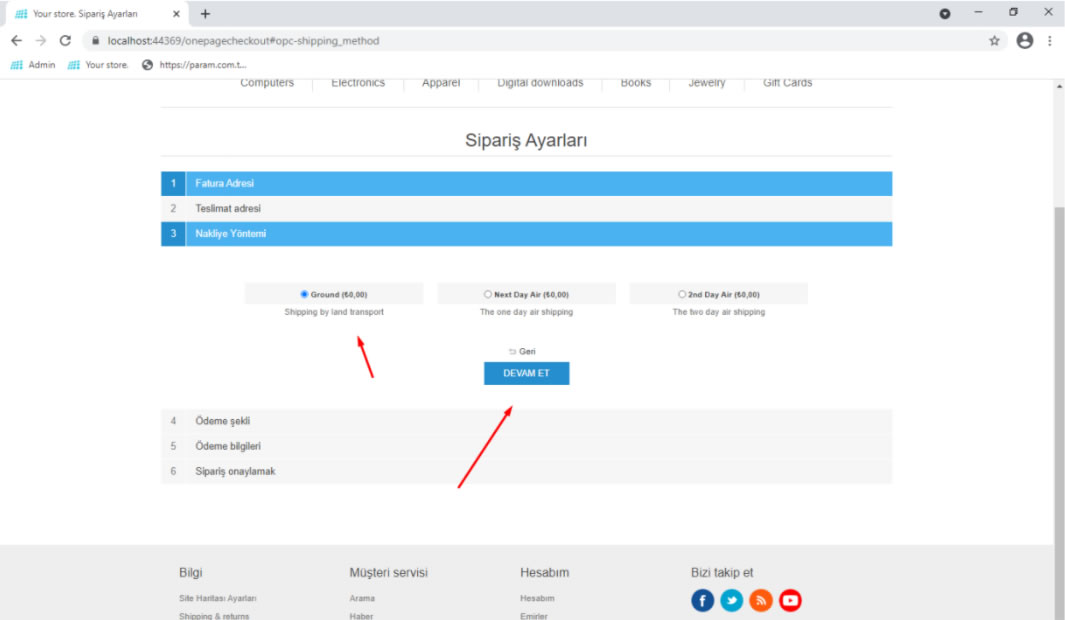
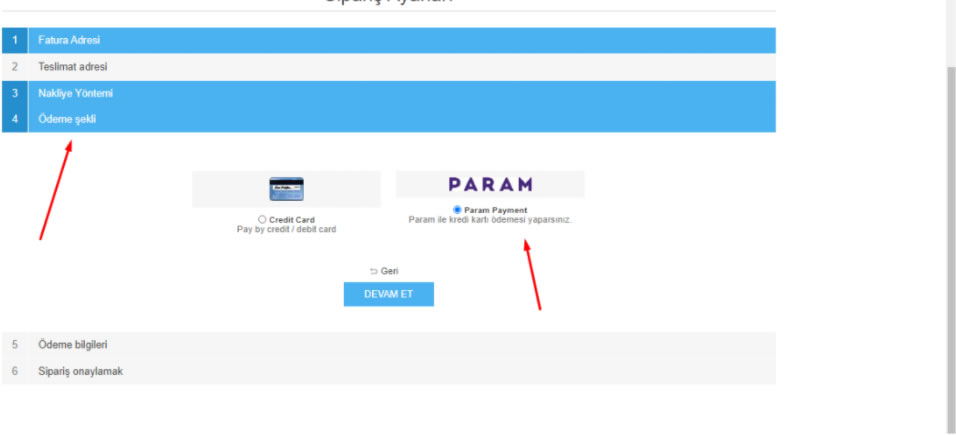
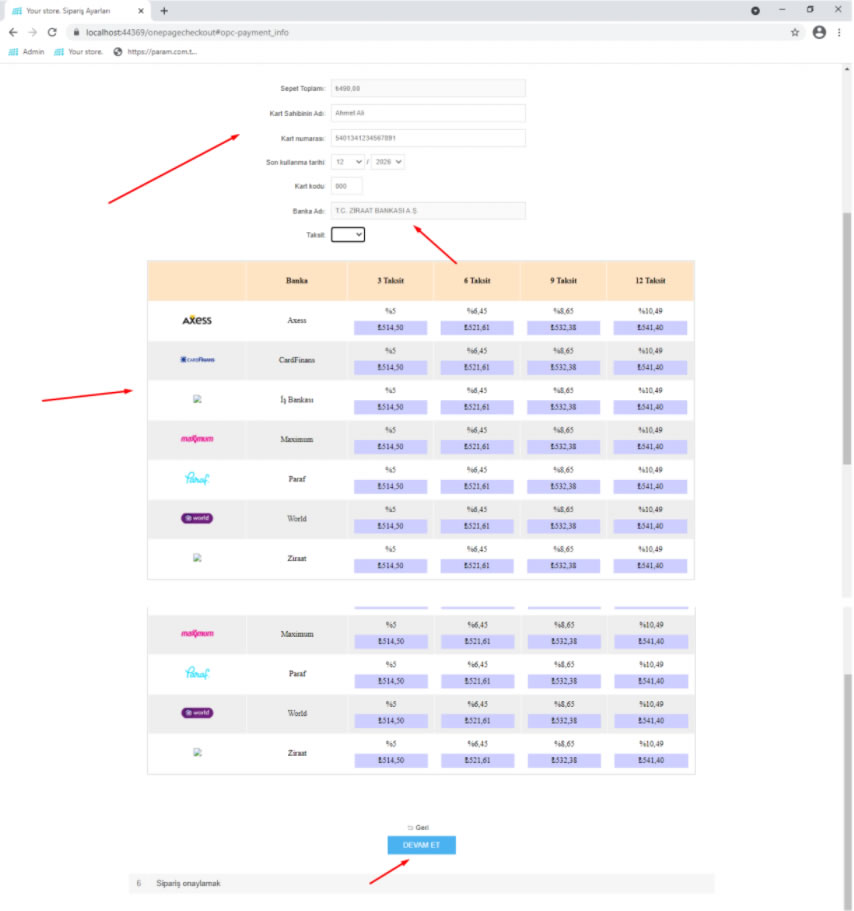
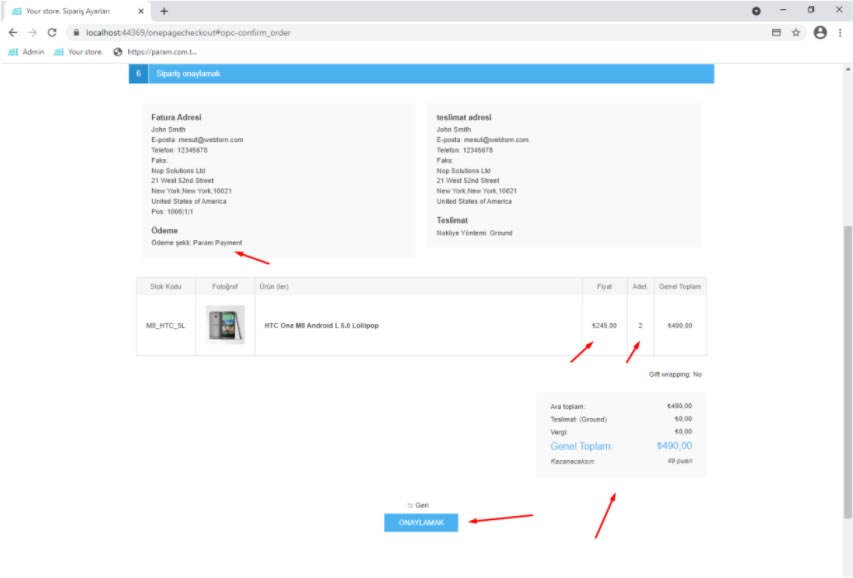
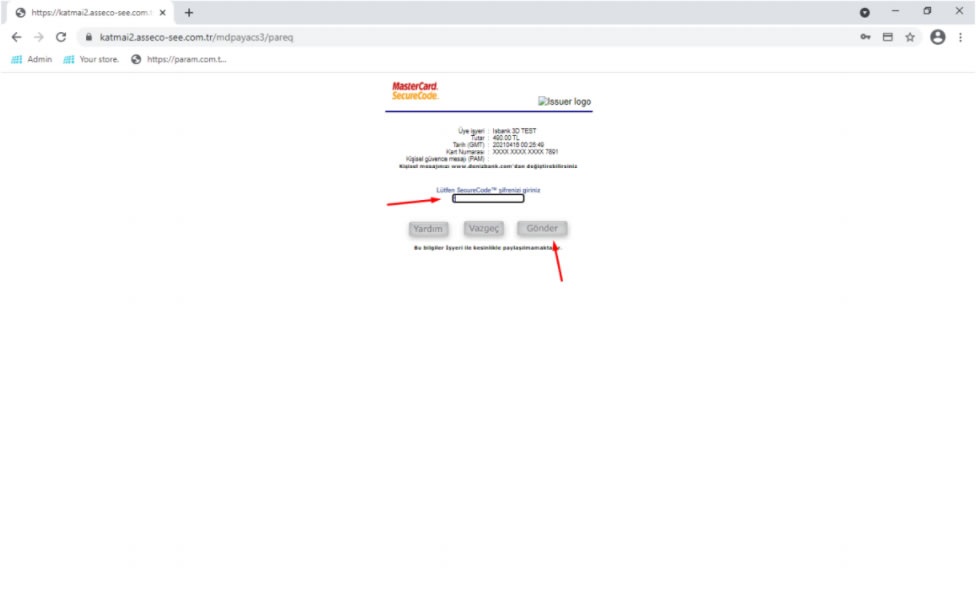
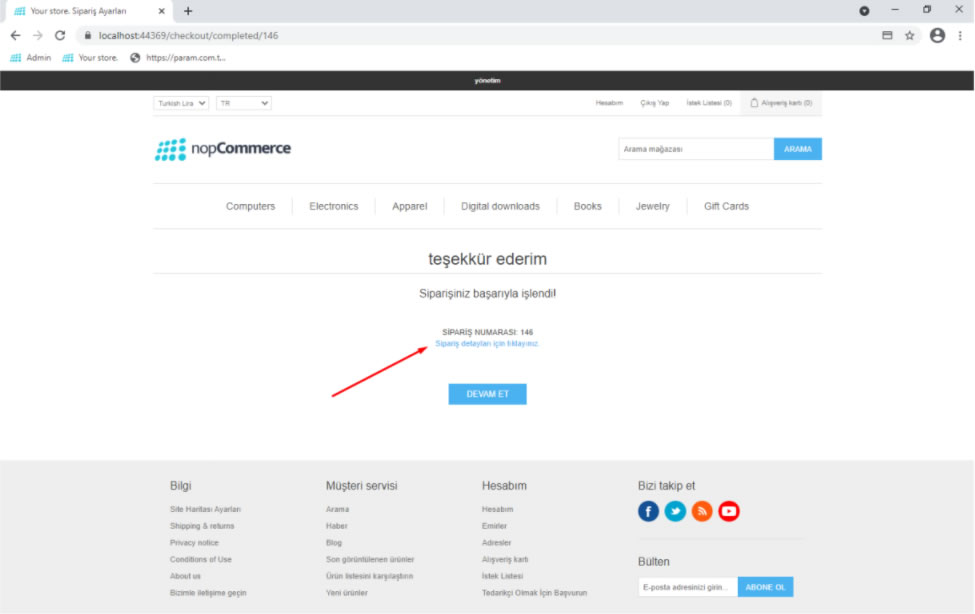
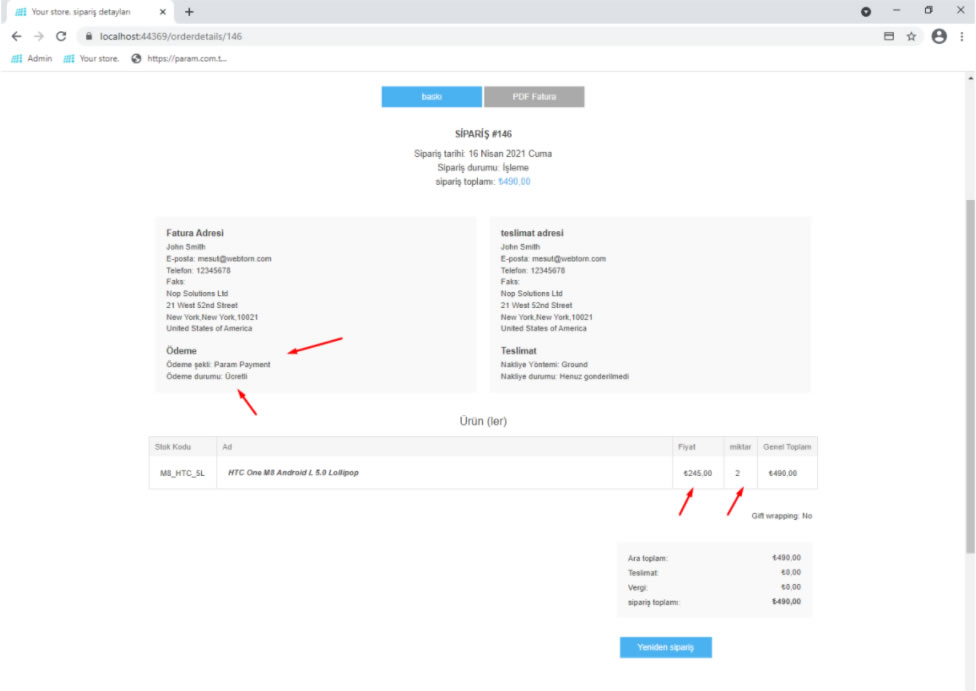
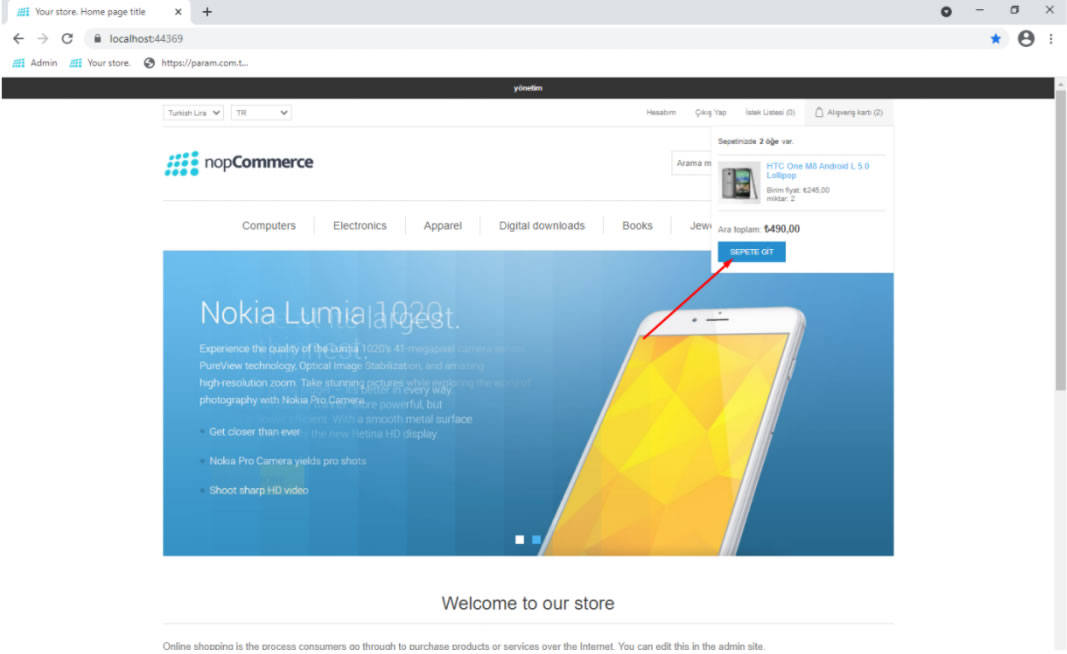
13. The demo payment process you can perform through a website is outlined in the following screen excerpts.
Shopping cart access and order settings: